Sunday 18 December 2011

Gingerbread House

This is a project I have been wanting to do for so long, I love gingerbread, and gingerbread houses look amazing. The fact that I did this is exactly the reason I started this blog, I don't take blogging very seriously, but love that I have a reason and outlet to make something as elaborate as this gingerbread house. It is relatively simple to make, but just takes ages as there is a lot of waiting around!

The gingerbread was probably the simplest part, you melt butter with muscavado sugar and golden syrup (which smelt amazing), and then fold it into eggs and the dry ingredients, and knead to a soft dough. I added cinnamon (cause its my fave), all spice, ginger and loads of orange zest so it tastes and smells SO christmassy, its times like this I wish smell-o-vision existed.


I downloaded some templates from the internet, I could have drawn some up myself, but why make things more difficult? I did however make some changes, I decided that the front windows should be 4-pane stained glass, and changed the top one to a heart window. I rolled out the dough into about a £1 thickness, then marked out the templates and cut them out. I placed some clear boiled sweets in the window gaps to make stained glass windows, I remember making stained glass window biscuits in school, and they were always horrible to eat, but certainly look pretty.


Then the easy bit, baking the panels! Again this took some time as I wanted to bake them all on the same shelf to ensure they cooked evenly so had to do a few batches. I also was mega paranoid about cooking them enough, I didn't want the panels to be too soft as then the house might collapse. Once baked they had to be left at least overnight to dry out, again so that they were crisp enough to stay upright.


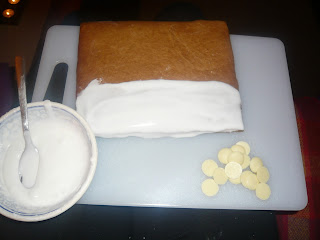
And then came the fun part! I wanted to tile the roof with chocolate buttons, I totally under-estimated how many buttons I would need, so I iced and tiled one roof panel one night and did the other one the next night. I then had to wait for these to dry completely. I used royal icing to ice everything, its so much stronger than normal icing and sets really hard so is ideal for use as plaster, which is essentially what I was using it for.


(note the obligatory glass of red wine on wine sundays)

So whilst the roof was drying, I constructed the body of the house, I did this quite haphazzardly, and with loads and loads of icing, I was paranoid that the walls would fall down so just kept reinforcing it.


And then I played the waiting game, again! This was definitely quite a big project to undertake, it took me just over a week, although in actual hours it wasn't that much. But then it was finally done! I had been collecting sweets for quite some time as I knew I was going to do this, and so had an exciting box of treats...


I had made a little gingerbread xmas tree, and covered it in royal icing dyed with wilton gel food colours (best investment), the great thing about royal icing is how thick it is so I could get a nice furry effect to the tree. I didn't have any specific plans for the decoration, I had done a couple of sketches as to how I wanted it to look, and had plans to make a little frozen pond by melting down some clear sweets, but then the board I used was too small anyway, so I settled for a dolly mixture path and a sporadic placement of sweets.


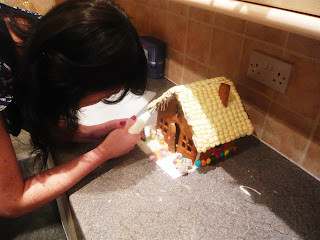
And then it was the moment of truth, putting the roof and chimney on! I was pleasantly surprised as to how sturdy the whole thing was, turns out I didn't need to be so worried. I enlisted my flatmate Rosie to turn her hand at making some icicles, and for someone who had never piped anything before, she did an excellent job!


And the final part was to give it a generous dusting of snow (icing sugar) and place it infront of the tree. A festive delight! It also still smells unbelievable, I'm not sure I can bear to let anyone eat it, perhaps after christmas, which is another bonus, gingerbread keeps incredibly well so will be edible for quite some weeks.
Most definitely in the Christmas spirit now!


Soph x

P.s, This post is dedicated to my amazing friend Felicity Dale, who is one of my biggest supporters, and has just bought her first real house, love you lots. x

Tuesday 6 December 2011

Orange and Poppy seed cake

Sometimes I just want to bake something really simple that I don't have to faff around with icing etc. This is my go-to cake. So as my first bake of the new house I thought i'd throw it together, only problem, I'd run out of poppy seeds, which shouldn't have been a massive problem but I couldn't find any in Chorlton! We tried so many places but no where had them, every seed imaginable, but no poppy seeds! So I ended up having to drive for half an hour to get some, bit ridiculous but once I have something in my head it has to happen. (true in my baking life and normal life)

The first thing to do for this cake is to soak the seeds in warm milk, I love this step, the milk is so concentrated with seeds that it makes the best consistency.


Then simply zest two or three oranges, I just used a grater as I don't have a zester (its in my dream kitchen at the moment) so you need to be careful to just get the nice top layers of zest, not the horrible bitter underneath.
After that it should be pretty straight forward, cream the butter and sugar, add the flour and eggs and mix in the milk. Should be straightforward. But when the motor on your hand held mixer burns out (the 3rd one this year) and you have to do this all by hand, its not so easy. Don't get me wrong, its possible, and I baked for many years without a handheld mixer, but it just takes so much longer and much more effort. There are certain things that I like because they take time and effort, bread making for example, but creaming butter and sugar is just dull.

One day, this guy will be mine, and hopefully not in the too far distant future. But it costs £400 minimum, and that is a bit much right now...One for the dream kitchen.

Anyway, back to the cake, I eventually got it all mixed in!

Love the way this mixture looks, bit like frogspawn?

And it went into one of my favourite tins, a star shape from Ikea:


The first time baking in a new oven is always difficult, temperatures vary so much. This one seems to be relatively true to the thermostat, maybe a little bit higher. So it was perhaps ever so slightly overcooked, but this cake is so moist due to the milk so it didn't suffer too much for it.


Really simple icing of melted butter, icing sugar, and orange zest and its ready to go.


Excessively twee...but necessary.

Soph x

Sunday 27 November 2011

Rainbow Birthday Cake


I'm back! I haven't had the internet for the past few months hence my absence, but I have now moved into an amazing new place with a bigger and better kitchen so will be doing lots more baking/blogging.

American rainbow cake is a cake that I have wanted to make for so long, I love how fake and ridiculous the colours are. So I invested in some gel colours, these are so highly concentrated that you genuninely only need to use the tiniest amount. So although it seems that anything that brightly coloured must be so incredibly bad for you, it actually hasn't had that much added to it, thus justifying me spending £20 on food colouring...No?


I wanted to debut the colours on a special occasion, so what could be better than my joint birthday party weekend with one of my besties Miss Annie Leith.

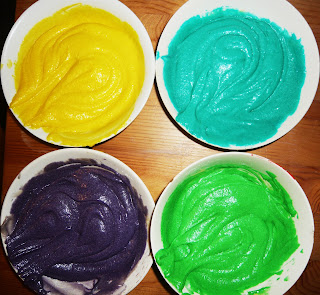
I started by making a basic cake mix, and then divided it into 6 seperate bowls to colour it. I had to bake each layer individually which was a bit annoying, and it was quite hard to get the temperature and baking time right for such thin layers, bit of trial and error, I reckon I could get they layers more even next time!


I wanted to get a good contrast to the colours so decided on a cream cheese frosting, I love how white it is and it also always feels really luxurious, a good mix between cheesecake and cake!

When I stacked it up I suddenly realised just how tall it was going to be, I had to feed 11 people so wasn't concerned about the amount of cake but rather the height, it had to travel 100miles to the lake district in the back of my car!


I did a crumb coat of the frosting first with the intention of icing it properly when I got there, I really wanted to hide the colours so that everyone in the car would still be surprised when I cut it open and it seemed to work!

It got there in one piece! (infront of the mountain of booze we had for the weekend)

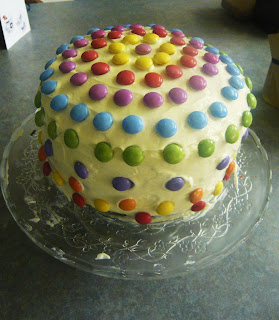
When decorating it I also wanted it to be quite simple on the outside, so I reigned myself in and stuck to a really basic smartie decoration, plus I got to eat the leftovers, always a bonus.


The big reveal! When Annie and I cut it open (wedding style, obviously) everyone was screaming at the rainbow interior so it was definitely a success!

A happy birthday girl.

And the carnage that was left! Oh, and it tasted good- a secondary concern.

Soph x